Introduction
This is a step-by-step walkthrough for setting up internal email redirects on your 34SP.com hosting account.
Redirects to external third parties are not supported. They may lead to your account being blacklisted – resulting in lost email. For more details please read our article ‘Email Redirects’
Setting up an email redirect
STEP 1
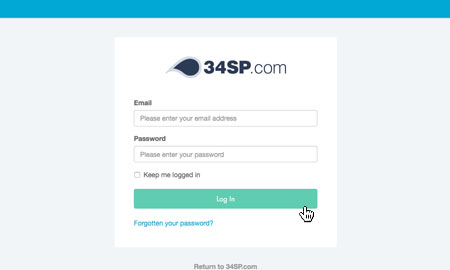
Login to your account
Firstly, you’ll need to login to your 34SP.com account at https://account.34sp.com.
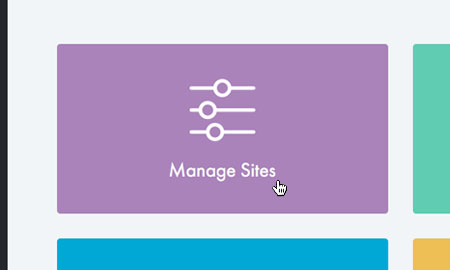
STEP 2
Choose ‘Manage Sites’
Once you have logged in, click on the ‘Manage Sites’ icon. This will bring up a list of websites or domain names you have in your 34SP.com account. Simply choose the website or domain name you wish to edit by clicking on it.
STEP 3
Select ‘Settings’
From the navigation menu, select the ‘Settings’ button beside the hosting you wish to inspect.

STEP 4:
Select ‘Email’
From the top navigation menu, select ‘Email’.

STEP 5
Select ‘Add New Email Address’
From the email menu, select the green ‘Add New Email Address’ button to get started.

STEP 6
Set up your redirect
Using the form on this page, set the ‘Email Address Type’ to ‘Redirect’ and then input your destination email address, and the email address you want it to forward to.
You can repeat this step for as many different destination email addresses as you like.

Information: If you have a standard mailbox set up with webmail login, you can also set a mail redirect, this will still send an email to the recipient but it will also send another copy to the mail redirect address you have set.