Applies to:
Reseller Hosting
Difficulty:
Easy
Time Needed:
5 minutes
Contents
Introduction
This is a quick step-by-step guide for installing and securing WordPress via Plesk Onyx, on Reseller Hosting.
Install WordPress
STEP 1
Login to your account
Firstly you’ll need to log in to your Plesk Onyx control panel, which will be at a URL similar to https://your_server_number.xenserve.com:8443/

STEP 2
Choose ‘Subscriptions’
Once you have logged in, click on the ‘Subscriptions’ option, in the left-hand menu.

STEP 3
Choose Your Site
This will bring up a list of websites you have on your Reseller Hosting account.
Locate the domain name you wish to access, then simply click on it.

STEP 4
Choose ‘Applications’
Then click the tab labelled ‘Applications’.

STEP 5
Install ‘WordPress’
Locate WordPress from the list of applications, and from the drop-down menu choose ‘Install (Custom)’.

STEP 6
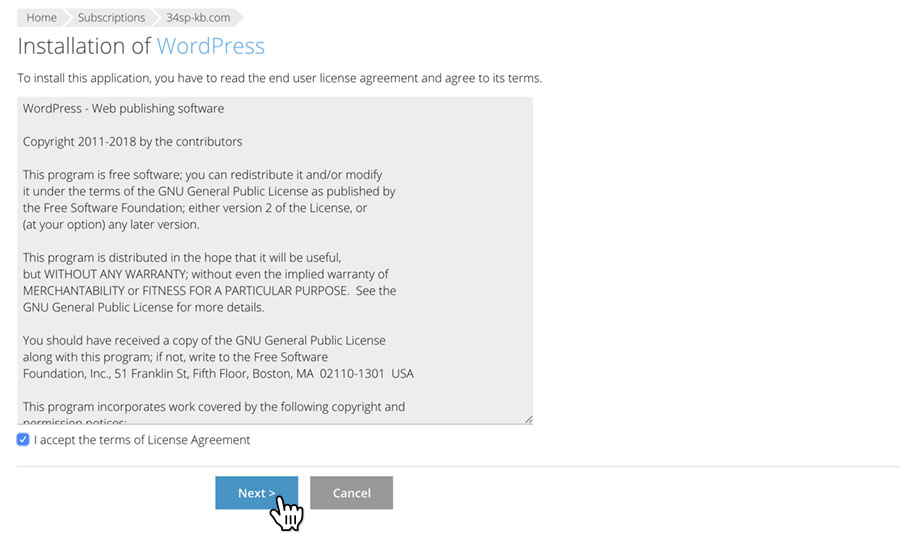
Accept the end user licence agreement
Then need to accept the end user licence agreement, by clicking the checkbox labelled ‘I accept the terms of Licence Agreement’, then clicking on the button labelled ‘Next’.
STEP 7
Choose the location ‘https’
Before installing WordPress, you will need to customise your WordPress install.
Firstly, secure your site by choosing ‘https’ from the first location drop-down.
Please note: In order to run your website over https, you will need to install a free Let’s Encrypt SSL certificate. For details on how to do this, see ‘Installing a Let’s Encrypt SSL certificate’.

STEP 8
Turn on automatic updates
Under the ‘Update Settings’ section, click on the checkbox labelled ‘Automatically update this add when updates are available’.
This will mean your WordPress installation is automatically kept up-to-date, which will reduce the likelihood of your website being hacked.

STEP 9
Install WordPress
Under the ‘Administrative access’ section, choose a secure username and password. When choosing a suitable username and password, we recommend avoiding dictionary words and using a mix of upper and lower case letters, as well as numbers.
After entering a secure username and password, scroll to the bottom of the form and click the button labelled ‘Install’ to complete your WordPress installation.

Adding security with WordPress Toolkit
STEP 1
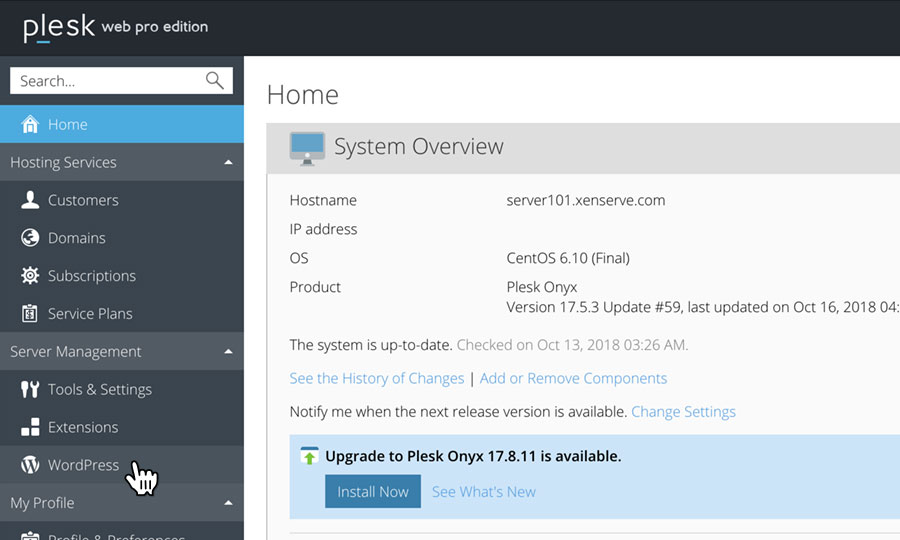
Choose ‘WordPress’
Plesk Onyx comes with WordPress Toolkit, which enables you to manage all your WordPress websites, plugins and themes from one single interface.
To access WordPress Toolkit, firstly click on ‘WordPress’ from the sidebar menu.
STEP 2
Scan for WordPress sites
The first time you use WordPress Toolkit, click the button labelled ‘Scan’ to perform a scan for WordPress sites installed on your Reseller Hosting account. Any WordPress sites discovered will be added in a list below.
After the scan is completed, you can manage your WordPress websites, themes and plugins via a single interface. We recommend keeping your themes and plugins up-to-date, in order to maintain the security of your WordPress websites.
