Applies to:
WordPress Hosting
Difficulty:
Easy
Time Needed:
5 minutes
Contents
Introduction
This is a quick step-by-step walkthrough for logging into the WordPress Admin Area for the first time.
Logging into the WordPress Admin Area for the first time
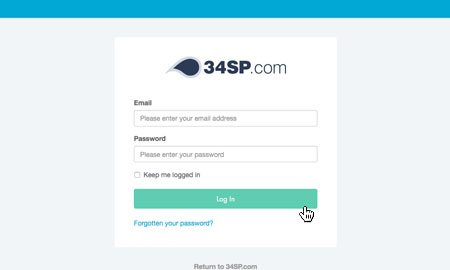
STEP 1
Login to your account
Firstly, you’ll need to login to your 34SP.com account at https://account.34sp.com.
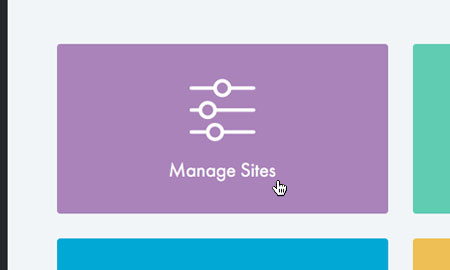
STEP 2
Choose ‘Manage Sites’
Once you have logged in, click on the ‘Manage Sites’ icon. This will bring up a list of websites or domain names you have in your 34SP.com account. Simply choose the website or domain name to wish to edit by clicking on it.
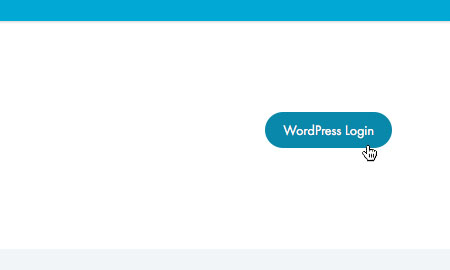
STEP 3
Click the ‘WordPress Login’ button
After you have clicked on the website or domain name you wish to edit, you will be presented with a page of options. Please click on the button labelled ‘WordPress Login’.
You should now find yourself in the WordPress admin area. For future logins, you can continue to use this method to login. Alternatively you can change your admin user or create a new user.
How to update your password for the WordPress Admin Area
STEP 1
Go to Users
The default username is randomly created, if you wish to keep this user then you can still update the password.
Firstly, within the WordPress Admin Area, click ‘Users’ from the main menu.

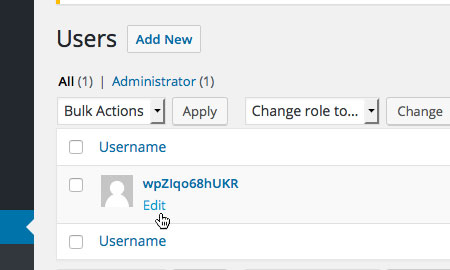
STEP 2
Edit Users
This will bring up a page listing all the users that have access to your WordPress Admin Area. Locate the user you wish to change, and simply click on the ‘Edit’ link.
STEP 3
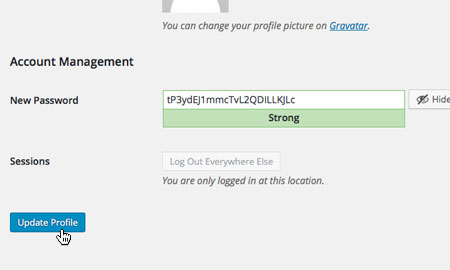
Create a new password
After you have clicked on the user you wish to edit, you will be presented with an overview of the users individual settings. Locate the area titled ‘Account Management’, and the field labelled ‘New Password’.
To create a new password, simply click on the button labelled ‘Generate Password’. This will then display a randomly generated password. If you wish to use a password you have chosen, simply delete the generated password and enter your own.
When you have entered the password you wish to use, simply scroll down to the bottom of the page and click on the button labelled ‘Update Profile’ to save your settings.
How to create a new user for the WordPress Admin Area
STEP 1
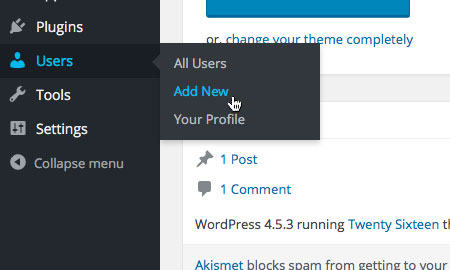
Choose ‘Add New’
Firstly, within the WordPress Admin Area, click ‘Users’ from the main menu, then choose ‘Add New’ from the sub menu below.
STEP 2
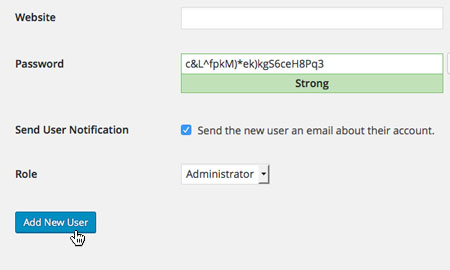
Create a new user
This will bring up a page containing a form. Fill in the username and email fields, which are both required.
To create a new password, simply click on the button labelled ‘Show Password’. This will then display a randomly generated password. If you wish to use a password you have chosen, simply delete the generated password and enter your own.
When you have entered the password you wish to use, ensure the ‘Role’ to ‘Administrator’.
Then simply scroll down to the bottom of the page and click on the button labelled ‘Add New User’ to create your new user.
How to login to the WordPress Admin Area via ‘wp-admin’ URL
STEP 1
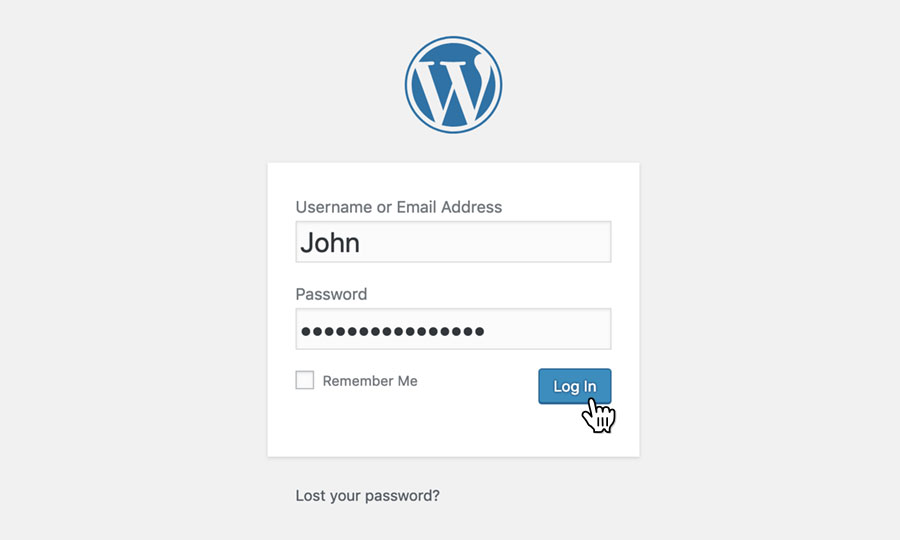
Logging in via ‘wp-admin’
If you have updated the password or added a new user you will be able to access the normal WordPress login screen via ‘yourdomain/wp/wp-login.php’ (note the /wp/ in the middle of the URL).
You can continue to login via the 34SP.com Client Control panel as well. If there are more then one administrator users within WordPress then the login via the 34SP.com tries the following:
- Will attempt to find an Administrator with the same email as the client details in the Client Control Panel
- If that fails, will login in as the administrator with the lowest user id.
Please note: Plugins which modify the WordPress login form such as adding 2factor authentication or extra fields, may prevent our login process from working. Please make sure you know your password before enabling such plugins.
If you need help with you log-in, please don’t hesitate to contact support.