Applies to:
Professional Hosting
Universal Hosting
Reseller Hosting
WordPress Hosting
Difficulty:
Easy
Time Needed:
5 minutes
Contents
Introduction
This is a step-by-step walkthrough for installing plugins in WordPress.
Plugins are a great way to add new features to your website, without having to write any code yourself. There are thousands of free plugins available to download from the official WordPress plugin directory.
STEP 1
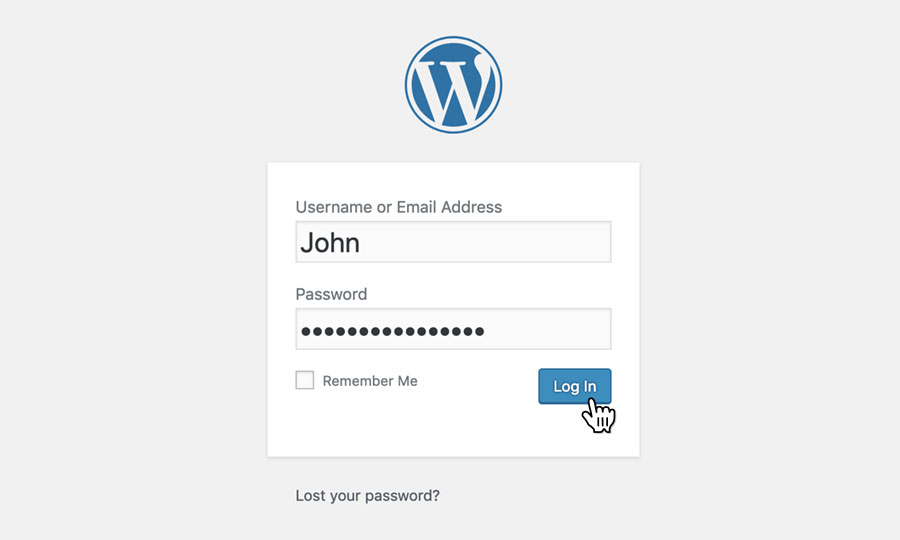
Log in to the WordPress admin dashboard
Firstly, you’ll need to log in to the WordPress admin dashboard. To access the login screen, simply go to yourdomain.com/wp-admin.
At the login screen, enter your username and password into the fields provided, then click the button labelled ‘Login’.
STEP 2
Choose ‘Plugins’
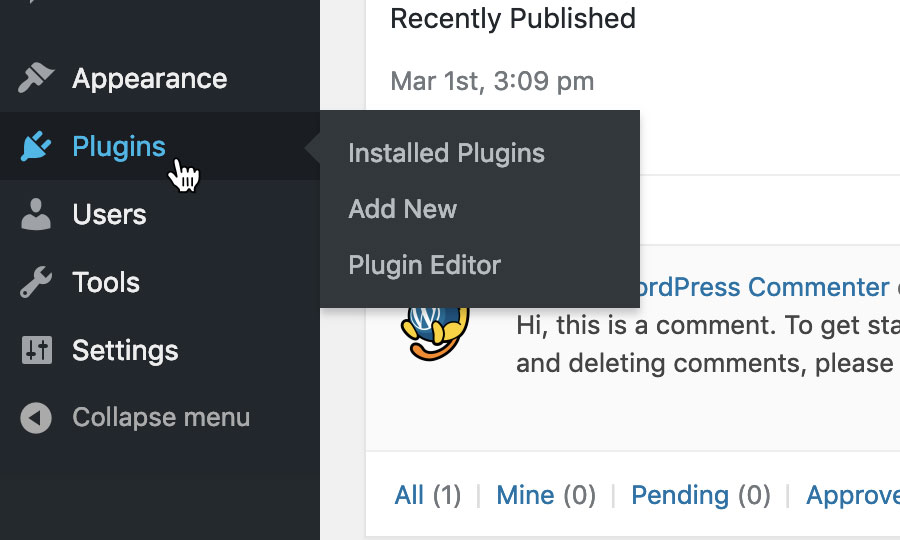
After logging in, you will be taken to the WordPress admin dashboard.
Use the navigation bar on the left-hand side of the screen, and choose ‘Plugins’.
STEP 3
Add new plugin
The Plugin screen lists all the plugins currently installed on your WordPress website.
To install a new plugin, click on the button labelled ‘Add New’.

STEP 4
Finding a plugin
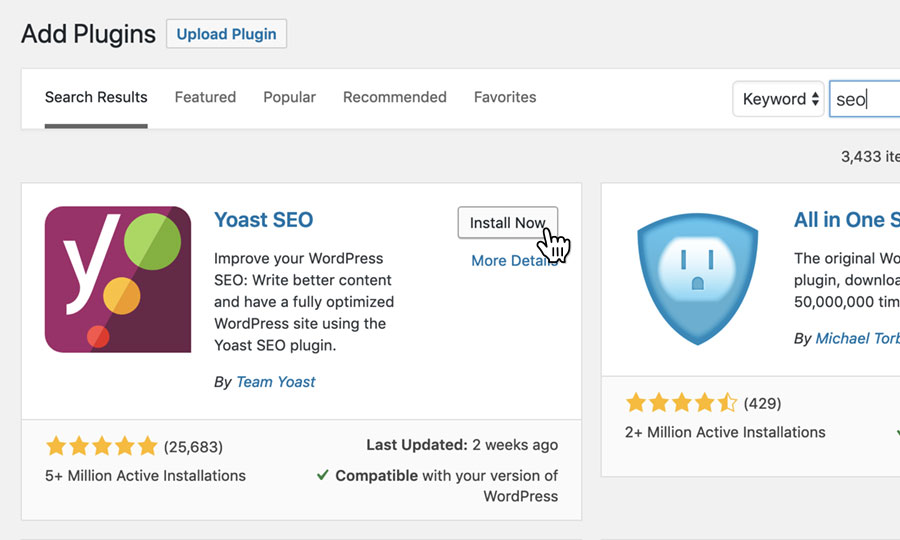
On the add plugin screen, you can browse popular and recommended plugins, as well as search for something more specific using the ‘Search plugins’ form.
When searching for a plugin, you can either search with keywords related to the plugin you are looking for or if you are searching for a specific plugin, just search for its name.
Tips for choosing a plugin: There are nearly 30,000 different WordPress plugins, and whilst many of them are great, some are not. Plugins that are no longer kept up-to-date can pose a security risk to your website.
If you are unsure which plugin to choose, check how many downloads the plugin has had, and look at reviews from previous customers. If a plugin has had lots of downloads and lots of positive reviews, then it is more than likely a safe bet to install.

STEP 5
Install the plugin
When you have found a plugin you wish to install, simply click on the Install Now button to begin installing the plugin.
STEP 6
Activating the plugin
After the plugin is installed, you then need to activate it. Firstly, return back to your plugins screen by using the navigation bar on the left-hand side of the screen, and choose ‘Plugins’.

STEP 7
Activate the plugin
The plugin screen will list all the plugins you have installed on your site, including the plugin you have just installed. Find the plugin from your list, and click on ‘Activate’. The plugin will then be running on your website.
Once activated, some plugins will have a range of settings or options you can adjust. Different plugins have different ways of doing this. Some will add a new option to the dashboards left-hand navigation bar, others will have a settings link on the plugin list screen, whilst others will not have any settings at all.

Deactivating a plugin
STEP 1
Choose ‘Plugins’
If you wish to stop a plugin from running, you can do so by deactivating it.
To deactivate a plugin, use the navigation bar on the left-hand side of the screen, and choose ‘Plugins’.

STEP 2
Deactivate a plugin
The plugin screen will list all the plugins you have installed on your site. Find the plugin to wish to deactivate from the list, and click on ‘Deactivate’. The plugin will then stop running on your website, and all settings associated with the plugin will be inaccessible.

Deleting a plugin
STEP 1
Choose ‘Plugins’
If you wish to delete a plugin, use the navigation bar on the left-hand side of the screen, and choose ‘Plugins’.

STEP 2
Deactivate a plugin
Before you can delete a plugin, you need to deactivate it. Find the plugin to wish to delete from the list, and click on ‘Deactivate’.

STEP 3
Deleting a plugin
Then return to the plugin you wish to delete, and click on the ‘Delete’ link. The plugin will be permanently removed from your site.
If you wish to reinstall a plugin you have deleted, simply follow the steps on ‘Installing and activating a new plugin’.
