Applies to:
Professional Hosting
Universal Hosting
Reseller Hosting
WordPress Hosting
Difficulty:
Easy
Time Needed:
5 minutes
Contents
Introduction
This is a brief introduction to using the WordPress admin dashboard.
The WordPress dashboard, often referred to as WP Admin, is a control panel for managing your WordPress website. Using the WordPress dashboard, you can create and manage your website’s content, add functionality to your site via plugins, change how your website looks via themes and much, much more.
Logging in to the WordPress admin dashboard
STEP 1
Log in to the WordPress admin area
Firstly, you’ll need to log in to the WordPress admin dashboard. To access the login screen, simply go to yourdomain.com/wp-admin.
At the login screen, enter your username and password into the fields provided, then click the button labelled ‘Login’.

STEP 2
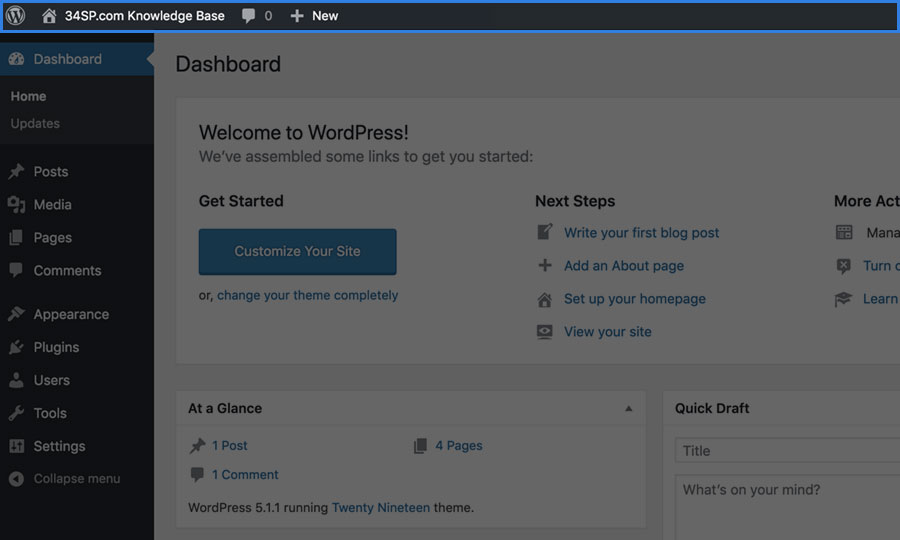
Welcome to WordPress!
After logging in, you will be taken to the WordPress admin area dashboard. If it is your first time logging into WordPress, you should be greeted by the message ‘Welcome to WordPress!’. The dashboard home screen provides an overview of your website.

Adding content, functionality and changing your website’s appearance
STEP 1
Navigating around the WordPress admin dashboard
The main way to navigate around parts of the WordPress admin dashboard is by using the sidebar menu, located on the left-hand side of the screen.

STEP 2
Add a new blog post
If you want to create a new blog post for your website, simply click on the ‘Posts’ link, from the sidebar menu.
For a detailed guide on how to create and manage your WordPress posts, please read our guide ‘How to add a new post in WordPress’.

STEP 3
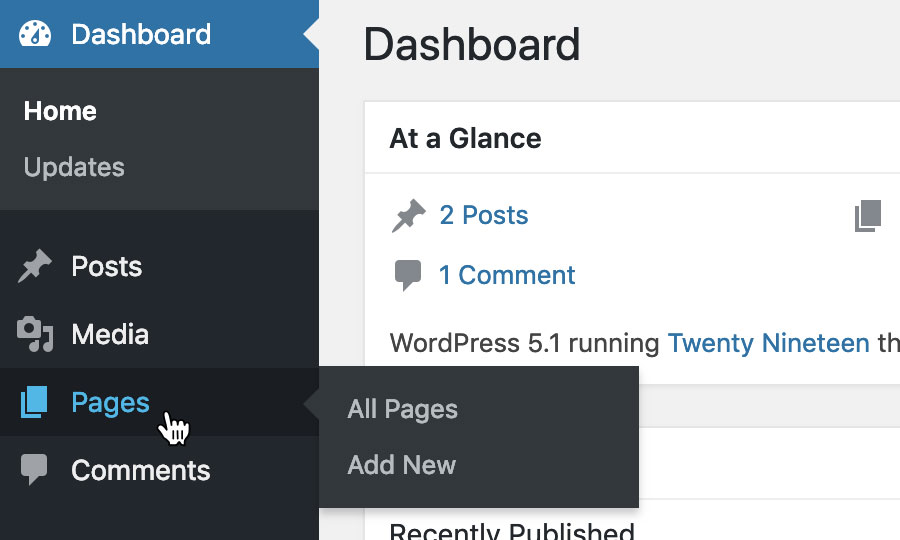
Add a new page
You can also add pages to your website via the WordPress admin dashboard. To add a new page, simply click on the ‘Pages’ link, from the sidebar menu.
For a detailed guide on how to create and manage your WordPress pages, please read our guide ‘How to add a new page in WordPress’.
STEP 4
Install a plugin
Plugins are a way of adding new functionality to your website, without having to write any code. There are thousands of free (and some paid) plugins to choose from and they can be installed on your website with just a few clicks.
To install a new plugin, simply click on the ‘Plugins’ link, from the sidebar menu.
For a detailed guide on how to install and manage your WordPress plugins, please read our guide ‘How to install a plugin in WordPress’.

STEP 5
Change your website’s appearance
You can also change the design of your website, using WordPress themes. Themes are templates that control how your website looks. Like plugins, there are thousands to choose from, many of which are free.
To install a new theme, simply click on the ‘Appearance’ link, from the sidebar menu.
For a detailed guide on how to install and manage your WordPress plugins, please read our guide ‘How to install a theme in WordPress’.

Using the WordPress toolbar
STEP 1
The WordPress toolbar
There are more options accessed via the WordPress toolbar, located the top of the WordPress admin dashboard.
STEP 2
View your site
You can toggle between your website, and the WordPress admin dashboard by hovering over your website name, and clicking the ‘Visit Site’ link.
Whilst you are logged in to the WordPress admin dashboard, the toolbar will display on your website too so that you can easily toggle between the two.

STEP 3
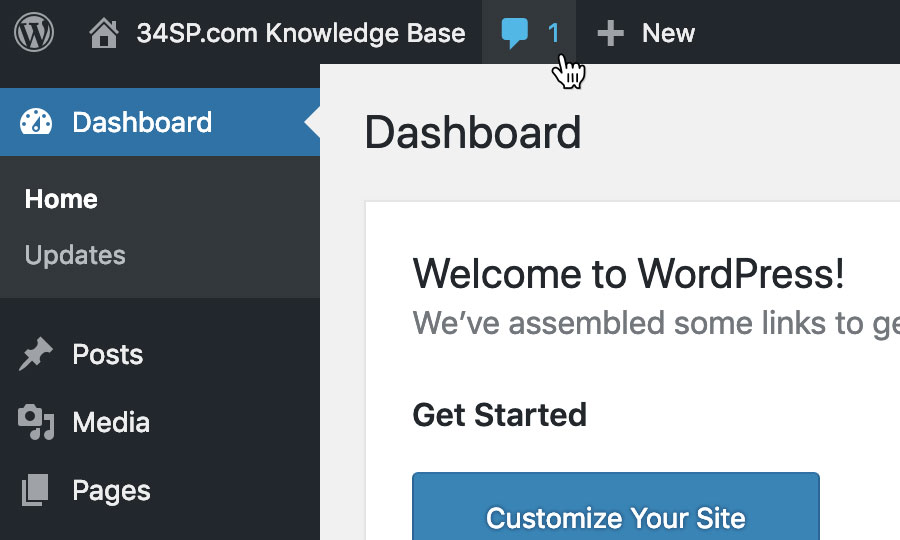
Manage your comments
If any of your website visitors have left comments on your blog posts, you can manage them by clicking on the speech bubble icon.
STEP 4
Quick links
You can also quickly create new content or users by clicking on the + New icon. From this menu you can:
- Add a new post
- Add new media (images, video, audio, pdf’s etc)
- Add a new page
- Add a new user

STEP 5
User settings
On the right-hand side of the WordPress toolbar, are your user preferences. Clicking on your username will display a menu, where you can;
- Edit your profile/preferences
- Log out of the WordPress admin dashboard

Customising the WordPress admin dashboard
STEP 1
Screen options
It is possible to customise the WordPress admin dashboard. One option is to hide or show different boxes of content so that each page shows the content that is important to you.
To customise your screen options, simply click the ‘Screen Options’ button, located underneath the WordPress toolbar, on the right-hand side of the screen.

STEP 2
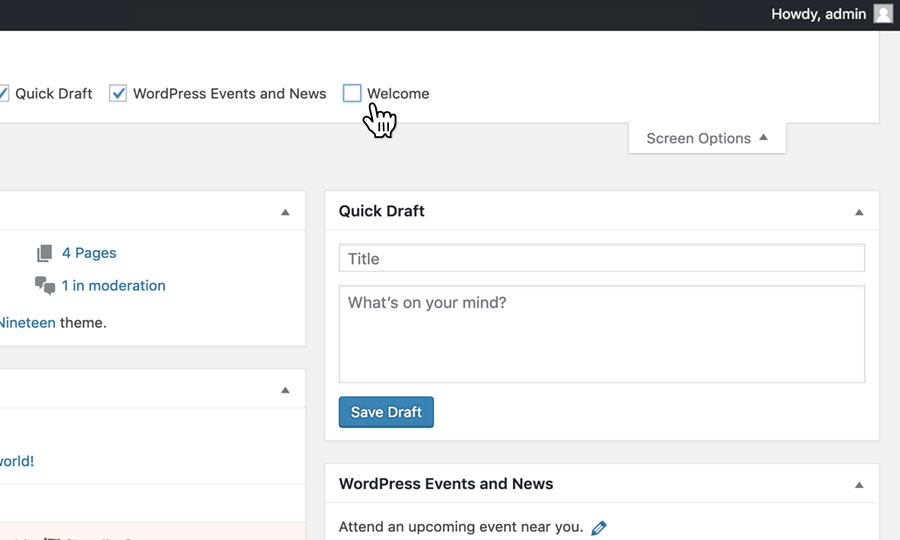
Choose which boxes to hide/show
Screen options vary from section to section. Simply click on the checkbox next to each section to toggle its visibility on or off.
STEP 3
Customise the colour palette
You can also change the colour palette of the WordPress admin dashboard. To do this, click on your username, located on the toolbar in the top right-hand side of the screen.

STEP 4
Choose ‘Edit my profile’
From the dropdown menu, choose ‘Edit my profile’.

STEP 5
Select a colour palette
Choose the colour palette you wish to use, and click on it. This will instantly change the colours on the WordPress admin dashboard.
Save your choice by scrolling down to the bottom of the page and click on the button labelled ‘Update Profile’.
