Applies to:
Professional Hosting
Universal Hosting
WordPress Hosting
Difficulty:
Easy
Time Needed:
5 minutes
Introduction
This is a quick step-by-step guide to setting up email on an iPhone, running iOS 11.
Please note: You need to have created a mailbox for your account as detailed at ‘How to manage your email addresses’before you can set up email your device.
How to setup email on iOS 11
STEP 1
iPhone Settings
Firstly, you’ll need to find the ‘Settings’ icon on your iPhone home screen.

STEP 2
Choose ‘Mail’.
Once you have found the settings icon, scroll down and tap on the ‘Mail’ option.

STEP 3
Choose ‘Add account’
You will be presented with a page of email related options. Please click on the option labelled ‘Add Account’.

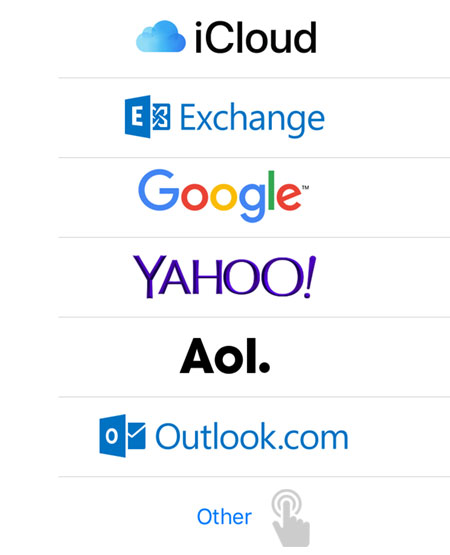
STEP 4
Choose ‘Other’
You will then be presented with a page of email providers. Scroll down to the bottom of this page and tap on the option labelled ‘Other’.
STEP 5
Choose ‘Add mail account’
From another page of options, tap on the option labelled ‘Add Mail Account’.

STEP 6
Mail account details
Enter your mailbox details into the fields provided, making sure that the email address and password match the mailbox details from your 34SP.com account. When you have entered the relevant details, tap ‘Next’ to proceed to the next stage.
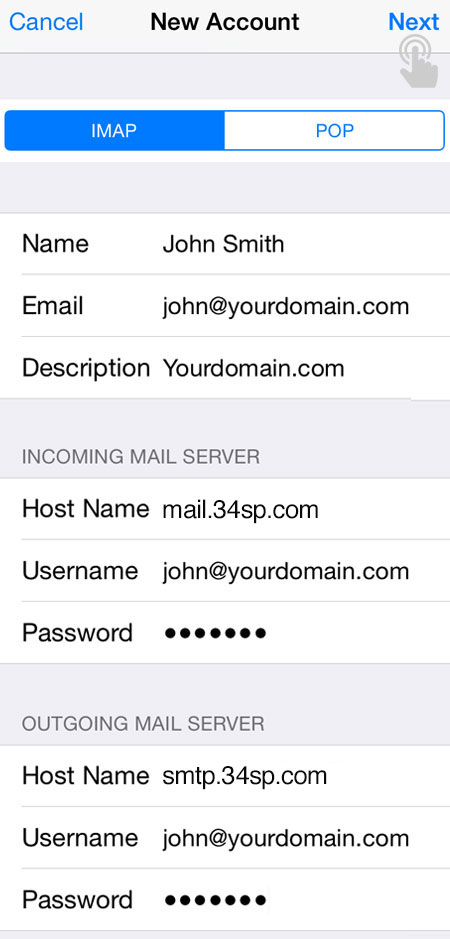
STEP 7
Incoming/Outgoing Mail Server
For incoming mail please enter the hostname as ‘mail.34sp.com’. Enter your email address as the username, and the email address password (as filled in on the previous screen) in the password field.
For outgoing mail please enter the hostname as ‘smtp.34sp.com’. Enter your email address as the username, and the email address password (as filled in on the previous screen) in the password field.
When you have entered the relevant details, tap ‘Next’ to proceed to the next stage.
Press continue.

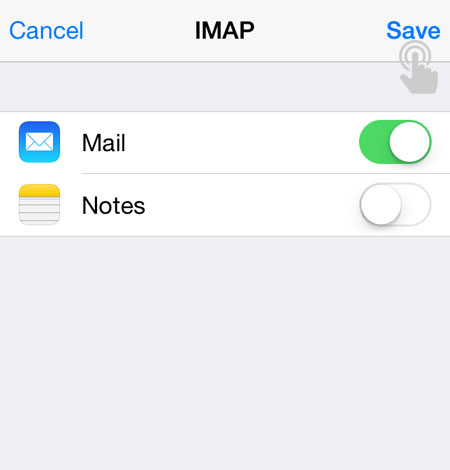
STEP 8
Turn off ‘Notes’
On the final step, turn off ‘Notes’ but keep ‘Mail’ on. When you have made these changes, tap on ‘Save’ and your mail setup is complete. Your should now be able to send and receive email via your iPhone.