Applies to:
WordPress Hosting
Difficulty:
Easy
Time Needed:
5 minutes
Introduction
This is a quick step-by-step walkthrough for unbanning IP addresses on WordPress Hosting. We use Fail2ban on our hosting accounts to monitor suspicious IP address activity, but on rare occasions people can trigger bans through genuine use. This guide will help you to unblock yourself, or your developer, in such an event.
Unbanning an IP address
STEP 1
Login to your account
Firstly, you’ll need to login to your 34SP.com account at https://account.34sp.com.

STEP 2
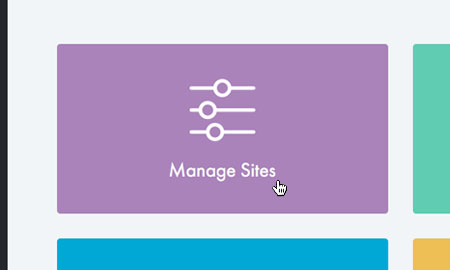
Choose ‘Manage Sites’
Once you have logged in, click on the ‘Manage Sites’icon.
This will bring up a list of websites or domain names you have in your 34SP.com account. Simply choose the website you wish to edit by clicking on it.
STEP 3
Select your hosting container
From the list of websites, select the name of your WordPress Hosting container.

STEP 4
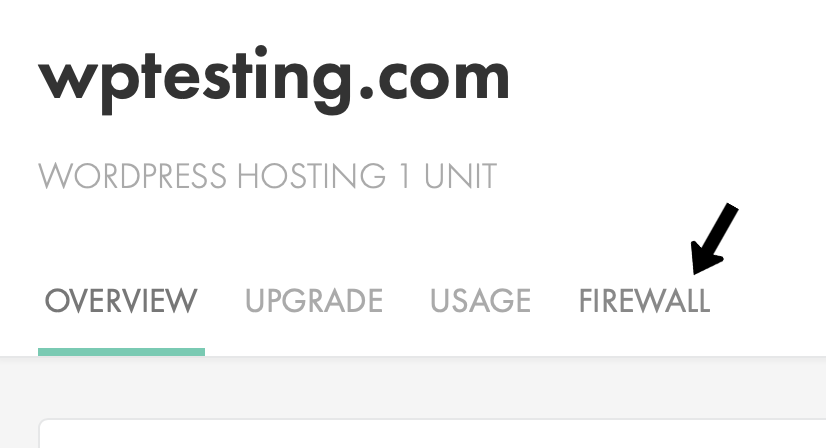
Select ‘Firewall’
From container settings, select the ‘Firewall option’
STEP 5
Select the IP address you wish to unban
The firewall page will list IP addresses that are blocked, and which websites they are blocked against. Click the blue link to the right side to unblock an IP address.
