Applies to:
Professional Hosting
Universal Hosting
Reseller Hosting
WordPress Hosting
Difficulty:
Easy
Time Needed:
5 minutes
Contents
Introduction
This is a step-by-step walkthrough for creating custom layouts in WordPress.
Inserting columns on a post or page
STEP 1
Create a new post or page
Firstly, you’ll need to log in to the WordPress admin dashboard and create a new post or page. If you are unsure how to do this, see the following guides.
- How to add a new post in WordPress
- How to add a new page in WordPress

STEP 2
Add a column block
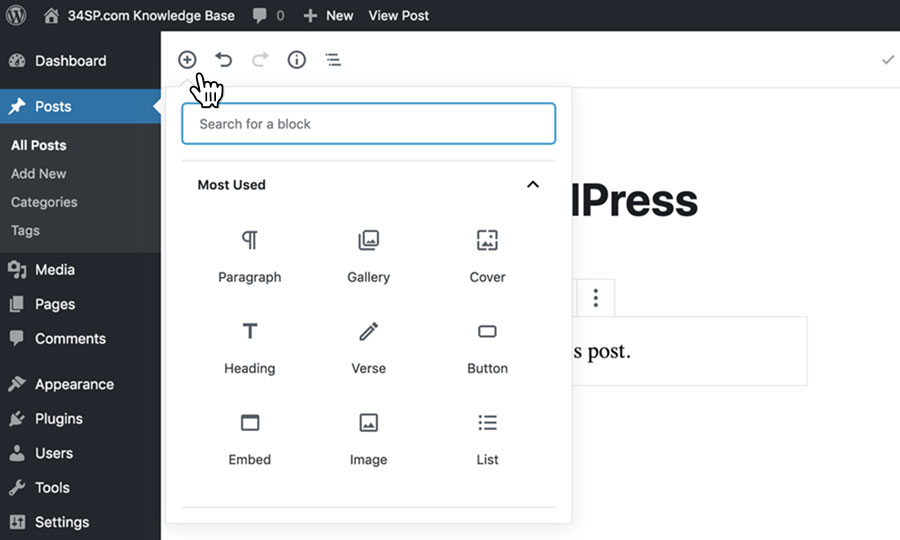
To add columns into your content, simply click on the + icon, in the top left-hand corner of the editor. Clicking this button will open the block browser.

STEP 3
Choose ‘Columns’
Scroll down the block browser and click on the heading ‘Layout Elements’, then choose ‘Columns’.

STEP 4
Adjust column width
Clicking on the column container (not the individual columns, but the block that contains them) will make the column toolbar appear above your columns. The toolbar lets you adjust the width of your column container. The columns inside the container will automatically adjust to the width you choose.
Choosing ‘Wide width’ will display the columns at the full width of your content.
Choosing ‘Full width’ will display the columns across the whole width of your site.

STEP 5
Add or remove columns
Additionally, when you click on the column container, settings appear in the right-hand menu.
These settings let you choose how many columns will be in your column container. You can choose between 1-6 columns.
The more columns you add, the slimmer they are. If you have a lot of content to add to your columns, then it may be better to create 2 column block of 3 columns, rather than a 1 column block of 6 columns.

STEP 6
Adding content to your columns
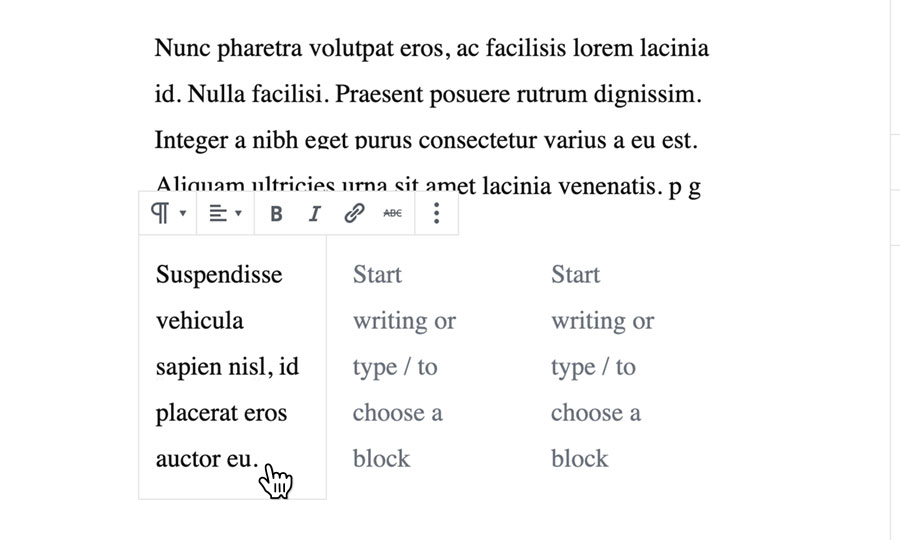
Adding content to the columns is very similar to adding any other content in WordPress. To add your content, click on the column you want to edit and start typing.

STEP 7
Adding more content
Each column can contain multiple blocks, so you can use a mixture of images and text within a single column.
To add another block to your column, just click on column you want to edit and click on the toolbar menu, located on the right-hand side of the toolbar (the icon with 3 dots).

STEP 8
Choose ‘Insert Before’ or ‘Insert After’
Then choose either ‘Insert Before’ or ‘Insert After’, depending on where you want your new block to appear in the column.

STEP 9
Choose your block type
Finally, click on the ‘+’ icon next to the block you have just inserted, and choose the type of block you wish to use.

STEP 10
Enter all your content
After you have added the necessary content to the 1st column, repeat the steps for the other columns in your container to build your design.

Inserting a separator into a post or page
STEP 1
Add a separator
Separators are a great way to create a break in your content. To add a separator into your content, simply click on the + icon, in the top left-hand corner of the editor. Clicking this button will open the block browser.

STEP 2
Choose ‘Separator’
Scroll down the block browser and click on the heading ‘Layout Elements’, then choose ‘Separator’.

STEP 3
Change the separator style
Clicking on the separator will make the separator toolbar appear. To change the appearance of your separator, click on the style dropdown.

STEP 4
Choose your separator style
Then simply click on your prefered style from the options available, and your separator will up updated.

Adding custom spacing into post or page
STEP 1
Add a spacer
It is now possible to add a custom spacer in WordPress, using the Gutenberg block editor.
Spacers are a great tool if you want to increase white space between other blocks of content (images, text). White space is used to create blank areas if your content is too cramped or close together. When used in the right place, adding spacing between content can improve comprehension.
To add a spacer into your content, simply click on the + icon, in the top left-hand corner of the editor. Clicking this button will open the block browser.

STEP 2
Choose ‘Spacer’
Scroll down the block browser and click on the heading ‘Layout Elements’, then choose ‘Spacer’.

STEP 3
Resizing your spacer
After adding a spacer to your page or post, you can resize it to make it bigger or smaller (minimum of 20 pixels).
To resize your space, just click on it and you will see a blue circular ‘handle’, which you can click and drag to resize your image.
Additionally, when you click on your spacer, size settings appear in the right-hand menu so that you can enter the size as a number.
