Applies to:
Professional Hosting
Universal Hosting
Reseller Hosting
WordPress Hosting
Difficulty:
Easy
Time Needed:
5 minutes
Contents
Introduction
This is a step-by-step walkthrough for uploading or embedding video, audio and other media in WordPress.
Inserting video into your post or page
STEP 1
Create a new post or page
Firstly, you’ll need to log in to the WordPress admin dashboard and create a new post or page. If you are unsure how to do this, see the following guides.

STEP 2
Add a video block
To add video into your content, simply click on the + icon, in the top left-hand corner of the editor. Clicking this button will open the block browser.

STEP 3
Choose ‘Video’
Scroll down the block browser and click on the heading ‘Common Blocks’, then choose ‘Video’.

STEP 4
Add your video file
There are three different ways you can add your video.
- Upload a video file from your computer
- Choose a video from your media library
- Insert from URL
Clicking ‘Upload’ will open a file browser, then you can use the file browser to locate the video file stored on your computer.
Choosing ‘Media Library’ will open up your WordPress media library, which is a way of browsing media files you have previously uploaded to your site.
If you want to use a video that is already online click ‘Insert from URL’. Then simply enter the full URL into the text field provided.

STEP 5
Aligning your video
Clicking on your video will make the video toolbar appear above your video. The toolbar lets you choose how your video sits within your content.
Choosing ‘Align left’ or ‘Align right’ will position your video to either the left or right of the page. It will mean that any text you write will ‘wrap’ around the video.
Choosing ‘Wide width’ will display the video at the full width of your content.
Choosing ‘Full width’ will display the video across the whole width of your site.

STEP 6
Adding a caption to your video
If you wish to add a caption to your audio file, simply click on the text that reads ‘Write caption’ and start typing.

STEP 7
Video settings
Additionally, when you click on your video, a range of settings appear in the right-hand menu.
These options include toggling on Autoplay which makes the video automatically play when a visitor views your page.
Other settings that can be toggled on are Loop, Muted audio and displaying Playback Controls (play, pause etc).
Additionally, there is a dropdown menu for preload settings.
The final option is for uploading a Poster Image, which is used as a thumbnail by your video when it is not being played.
Considerations when using video: Most browsers will play videos that are in MP4 format, so if your video is not in MP4 format you will need to convert your video file before uploading. Bear in mind that different browsers and devices have slightly different ways of handling video content, so even if you choose, for example, to have your video autoplay this won’t necessarily happen across every device.

Inserting audio into your post or page
STEP 1
Add an audio block
To add audio into your content, simply click on the + icon, in the top left-hand corner of the editor. Clicking this button will open the block browser.

STEP 2
Choose ‘Audio’
Scroll down the block browser and click on the heading ‘Common Blocks’, then choose ‘Audio’.

STEP 3
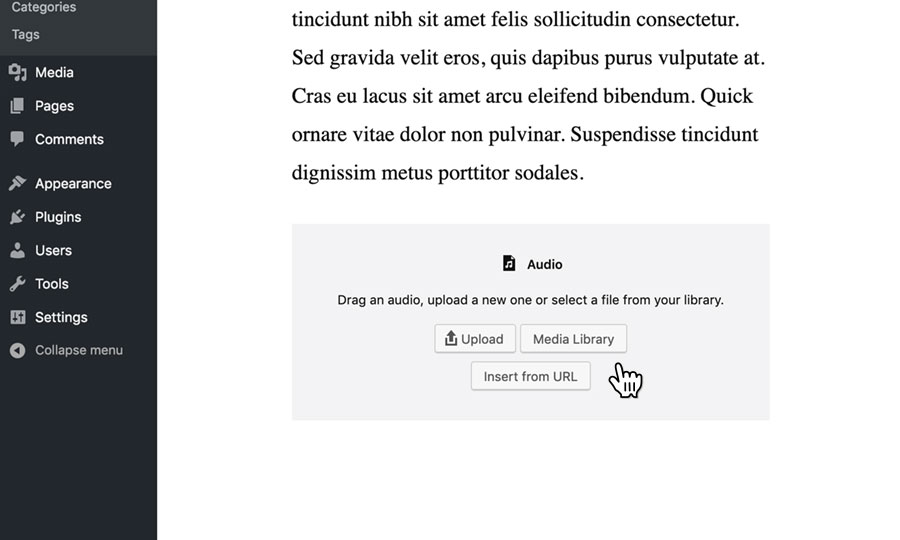
Add your audio
There are three different ways you can add your audio.
- Upload an audio file from your computer
- Choose an audio file from your media library
- Insert from URL
Clicking ‘Upload’ will open a file browser, then you can use the file browser to locate the audio file stored on your computer.
Choosing ‘Media Library’ will open up your WordPress media library, which is a way of browsing media files you have previously uploaded to your site.
If you want to use an audio file that is already online click ‘Insert from URL’. Then simply enter the full URL into the text field provided.
STEP 4
Aligning the audio player
Adding an audio file creates an audio player. Clicking on the audio player will also make the audio toolbar appear. The toolbar lets you choose how the audio player sits within your content.
Choosing ‘Align left’ or ‘Align right’ will position the audio player to either the left or right of the page. It will mean that any text you write will ‘wrap’ around the audio player.
Choosing ‘Wide width’ display the audio player at full width of your content.
Choosing ‘Full width’ display the audio player across the whole width of your site.

STEP 5
Adding a caption to your audio
If you wish to add a caption to your audio file, simply click on the text that reads ‘Write caption’ and start typing.

STEP 6
Audio settings
Additionally, when you click on your audio file, a range of settings appear in the right-hand menu.
These options include toggling on Autoplay, which makes the audio automatically play when a visitor views your page.
Additionally, you can choose to Loop your audio, so that it continuously plays.

Embedding video, audio or other media into your post or page
STEP 1
Add an embed block
Alongside being able to upload your audio and video files directly to your site, WordPress also supports embedding media from external platforms, such as YouTube, Vimeo, Spotify, Soundcloud etc.
There are numerous advantages to embedding media content, rather than hosting it on your own site. For example, video platforms such as Youtube or Vimeo handle the encoding/serving of your video and offer tools such as analytics, subtitle editors etc. Because these services specialise in video, they are able to deliver content that is optimised for the device it is being viewed on.
Embedding isn’t restricted to video or audio content. WordPress supports a huge range of platforms such as Twitter, Instagram, Flickr, Reddit, Imgur etc.
To add an embedded media into your content, simply click on the + icon, in the top left-hand corner of the editor. Clicking this button will open the block browser.

STEP 2
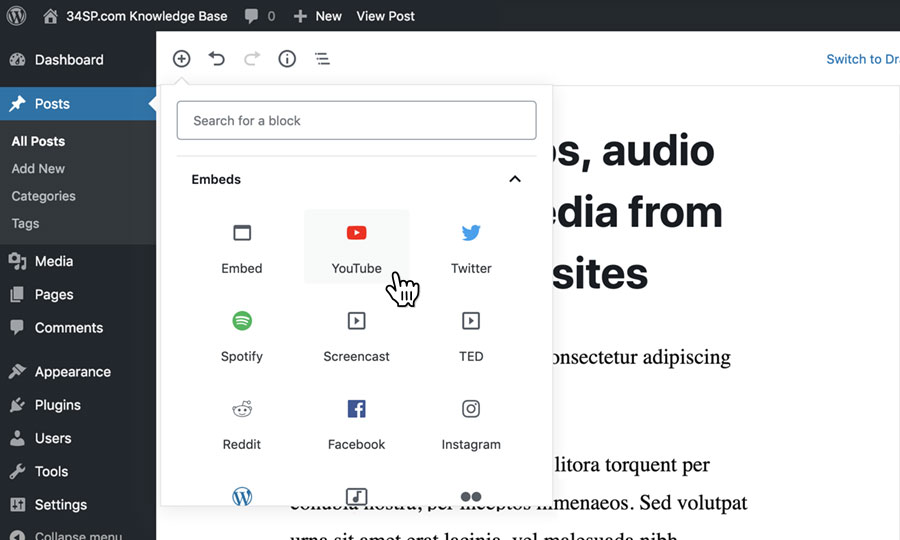
Choose your platform
Scroll down the block browser and click on the heading ‘Embeds’, and choose the platform you wish to embed the content from. If the platform isn’t one of the ones listed, simply choose ‘Embed’ to add a custom embed, and WordPress will attempt to embed your content.
STEP 3
Add your embed URL
Then enter the URL of your embedded media into the text box provided, and click on the button labelled ‘Embed’.

STEP 4
Aligning the embedded media
Clicking on your embedded media will make the toolbar appear above it. The toolbar lets you choose how your embedded media sits within your content.
Choosing ‘Align left’ or ‘Align right’ will position your embedded media to either the left or right of the page. It will mean that any text you write will ‘wrap’ around the embedded media.
Choosing ‘Wide width’ will display the embedded media at the full width of your content.
Choosing ‘Full width’ will display the embedded media across the whole width of your site.

STEP 5
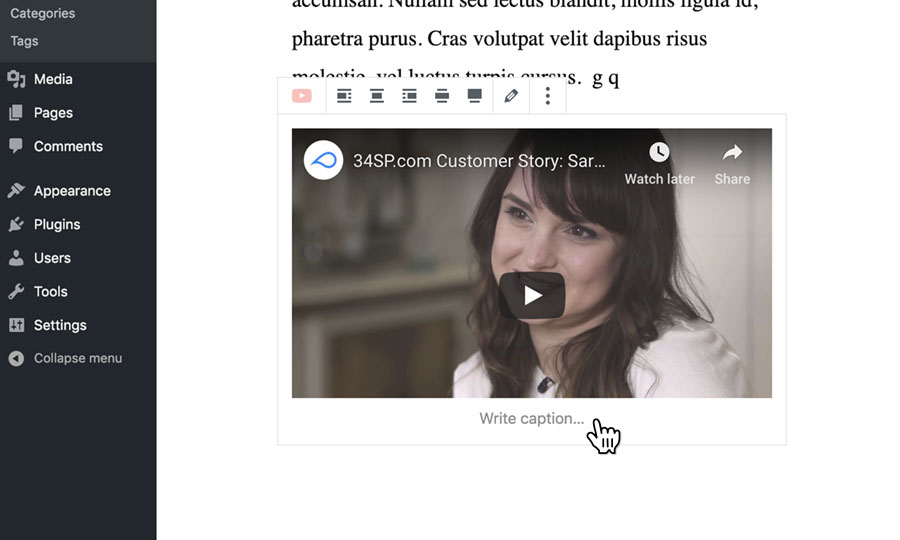
Adding a caption to your embedded media
If you wish to add a caption to your embedded media, simply click on the text that reads ‘Write caption’ and start typing.
STEP 6
Embed settings
Additionally, when you click on your embedded media, settings appear in the right-hand menu.
These options can differ, depending on the content you are embedding. In most cases, you are given the option to resize the embedded media for smaller devices, which is toggled on by default.
